Never before has anyone been able to create custom Super Fan or ad retargeting audiences from engagements (reactions and comments)…UNTIL NOW!

The most engaged leads are your most important leads, and now your most important custom and lookalike audiences too!
Below are two videos for creating custom and or lookalike audiences from your Super Fans or from engagements (reactions/comments) on a single or set of ads with Smart Search.
Watch the appropriate videos below and then refer to the section on what to do after downloading your .CSV file lower on this page – to easily create a Facebook custom audience.
Creating A Super Fan Custom or Lookalike Audience
Creating A Custom Retargeting Audience From Ad Engagements (Reactions and Comments) With Smart Search
What To Do After Downloading A CSV File Of Your Custom Audience?
IMPORTANT: If you are planning to open your .CSV file export within Excel, please READ THIS QUICK NOTE.
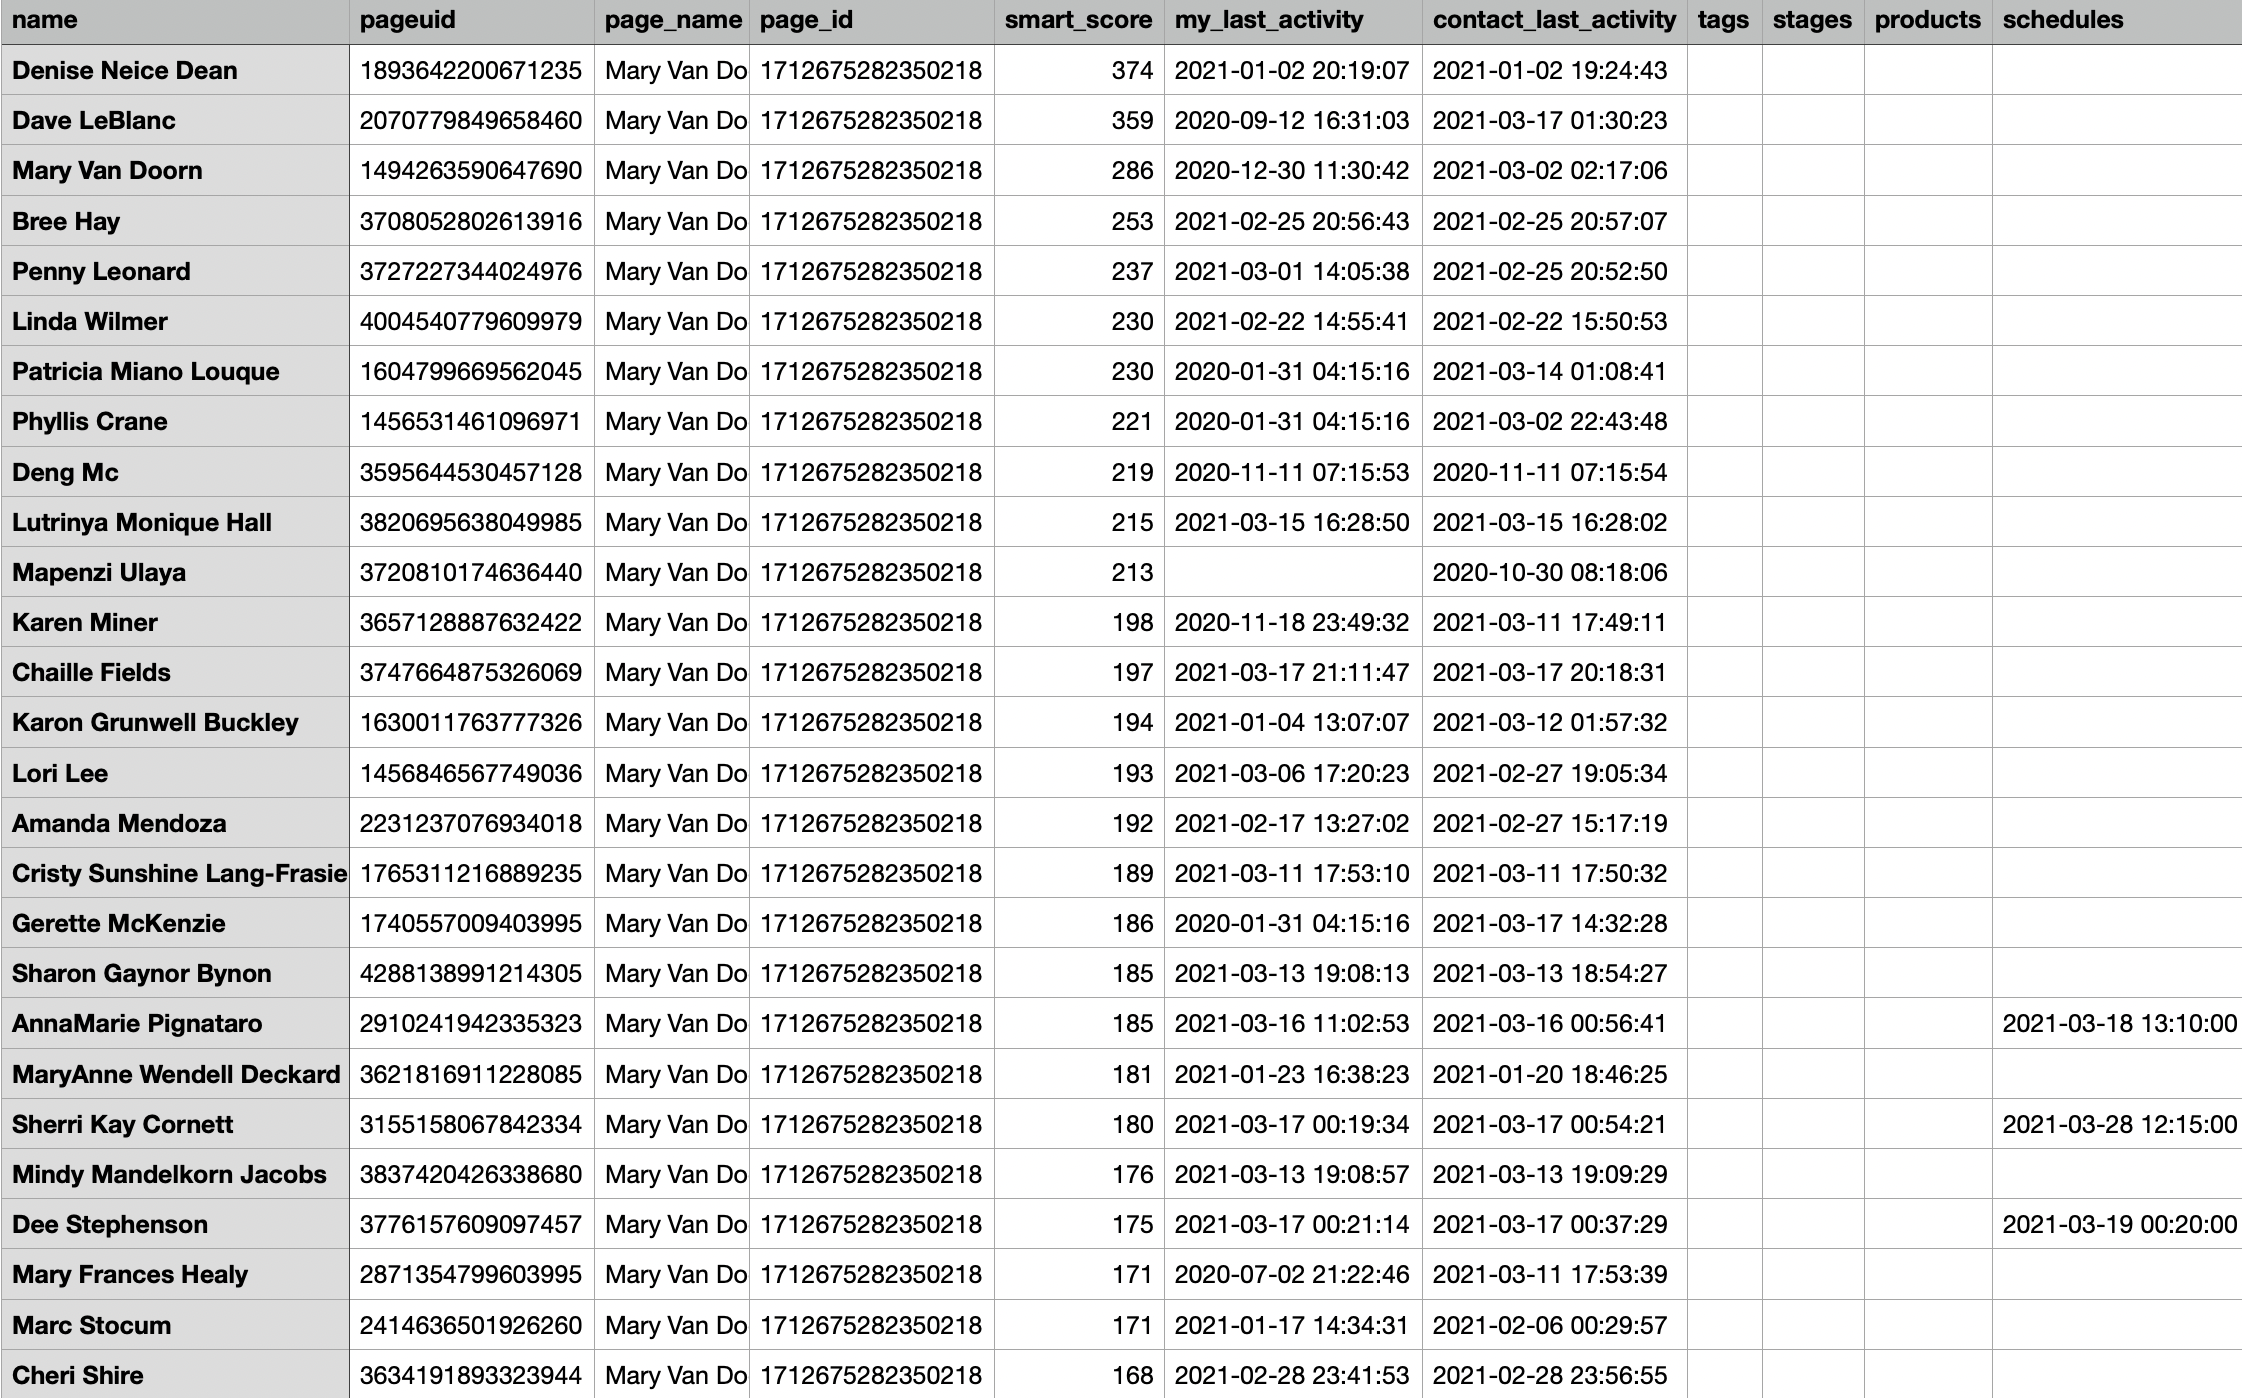
- STEP 1: Wait for the file to finish generating and then click on the Download button that appears to export your contacts.
- STEP 2: Log into your Facebook account and then go to Ads Manager > Audiences or CLICK HERE.
- STEP 3: Click Create Audience > Custom Audience > Customer List and then click Next.

- STEP 4: On the next page, where it says “How to Prepare Your Customer List,” leave everything as is and click Next.

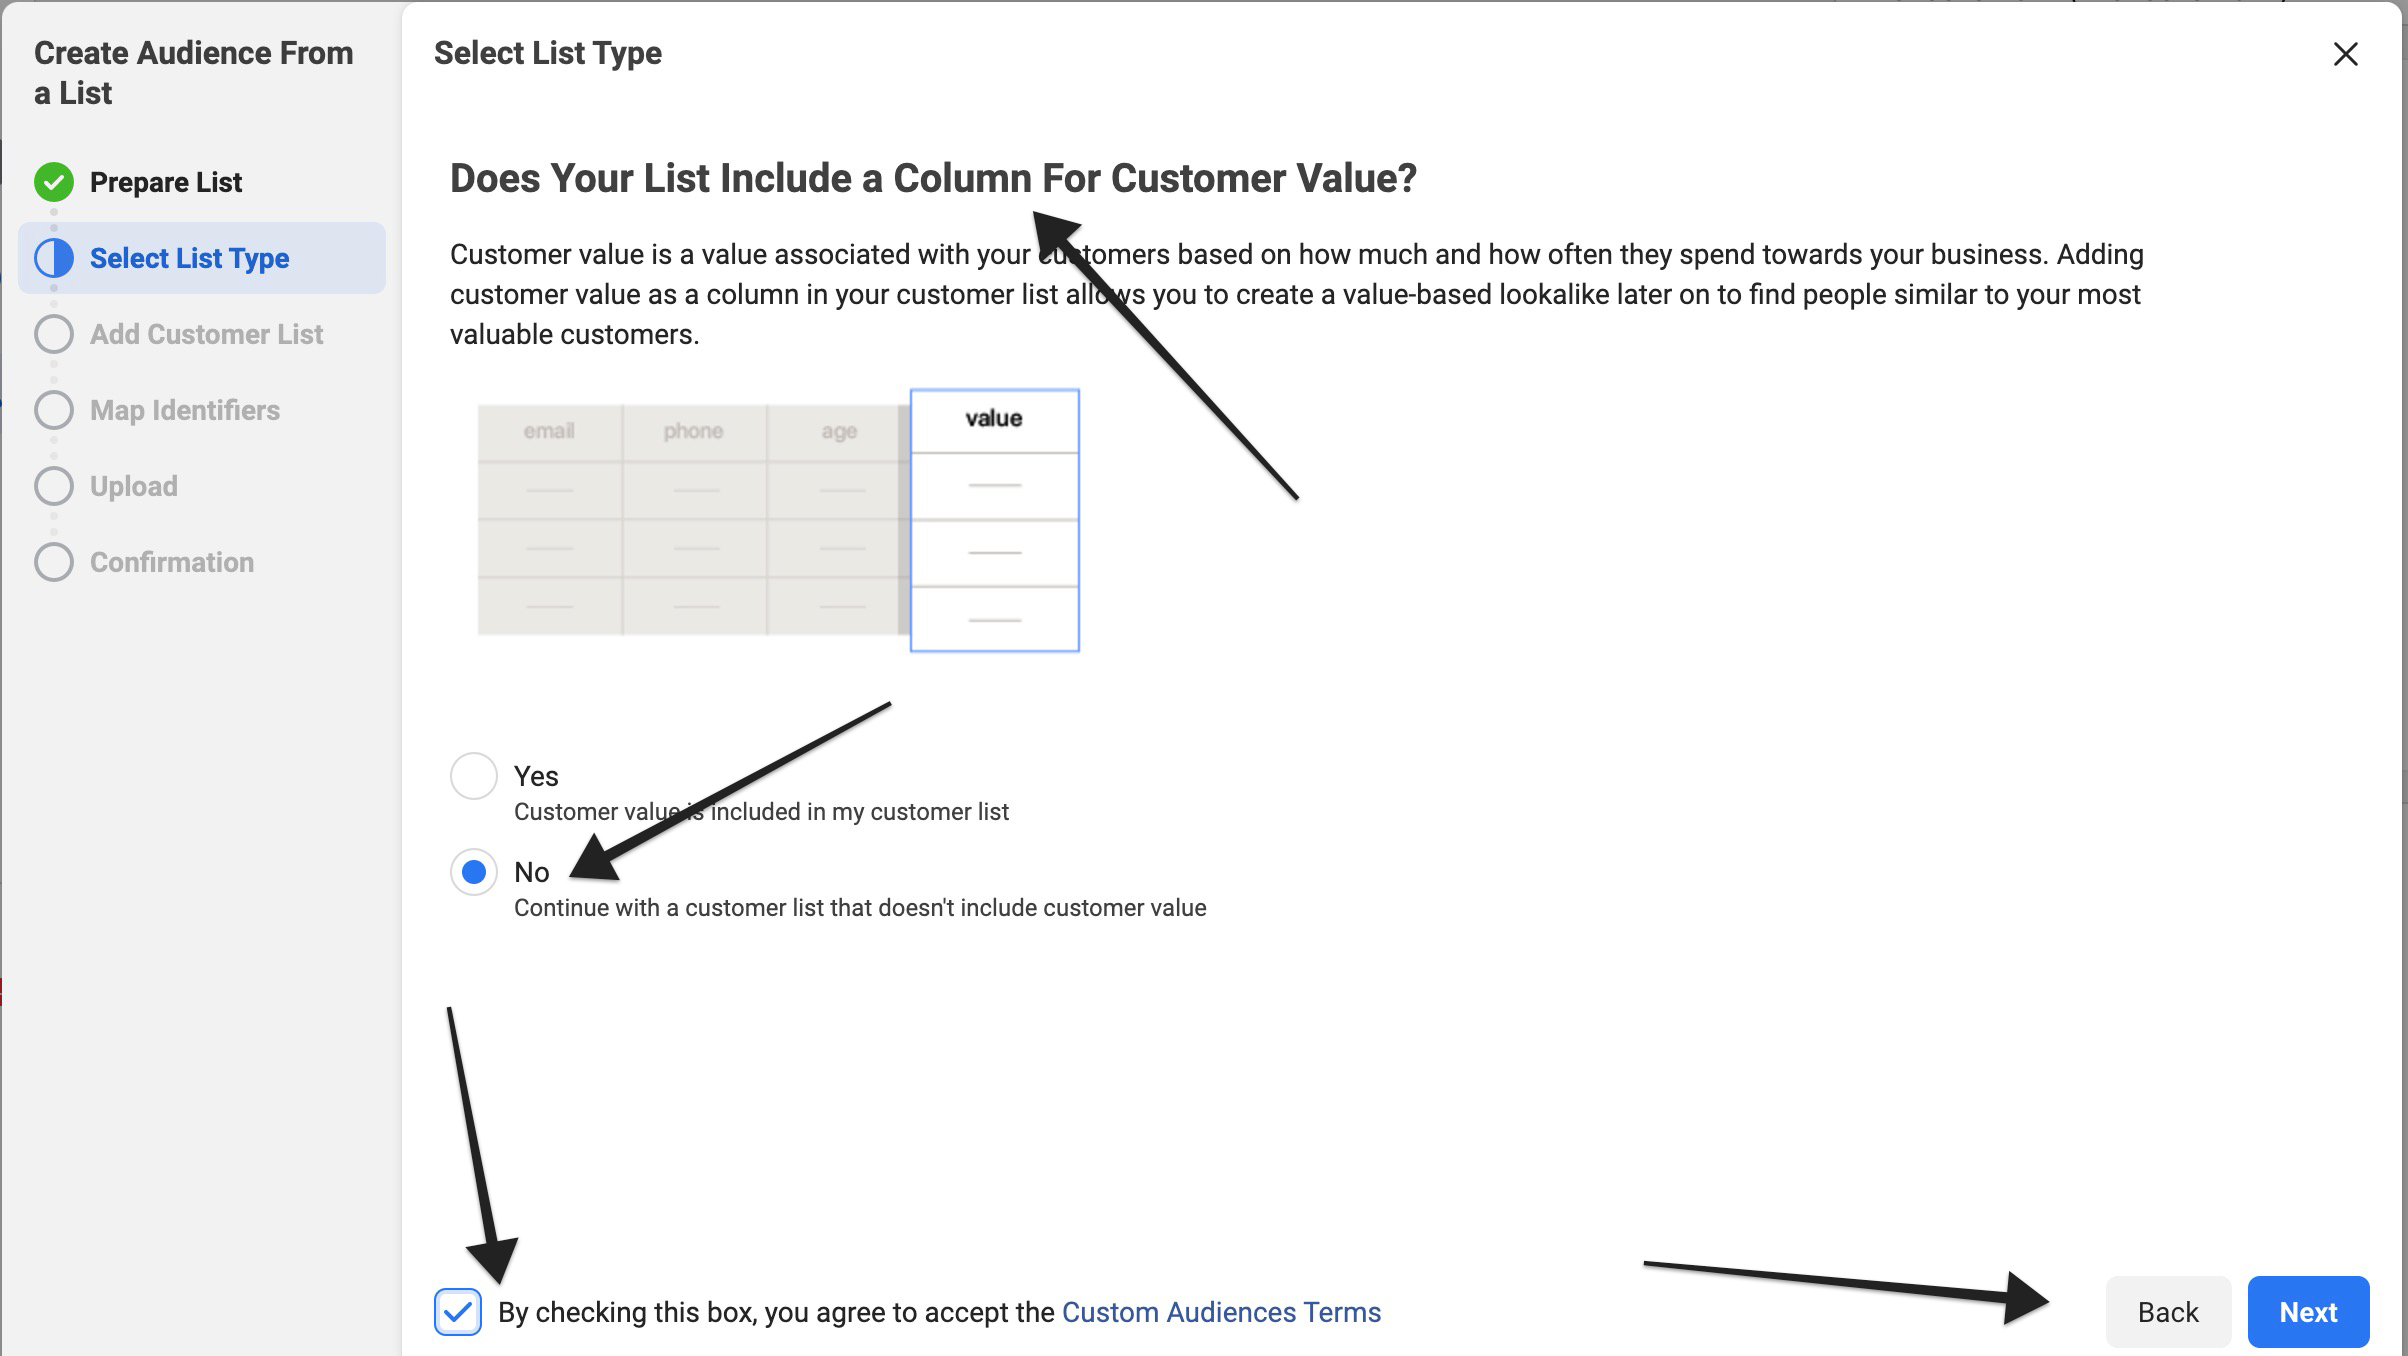
- STEP 5: Where it says “Does Your List Include a Column For Customer Value,” choose No, check the box to accept the Custom Audience Terms, and then click Next.
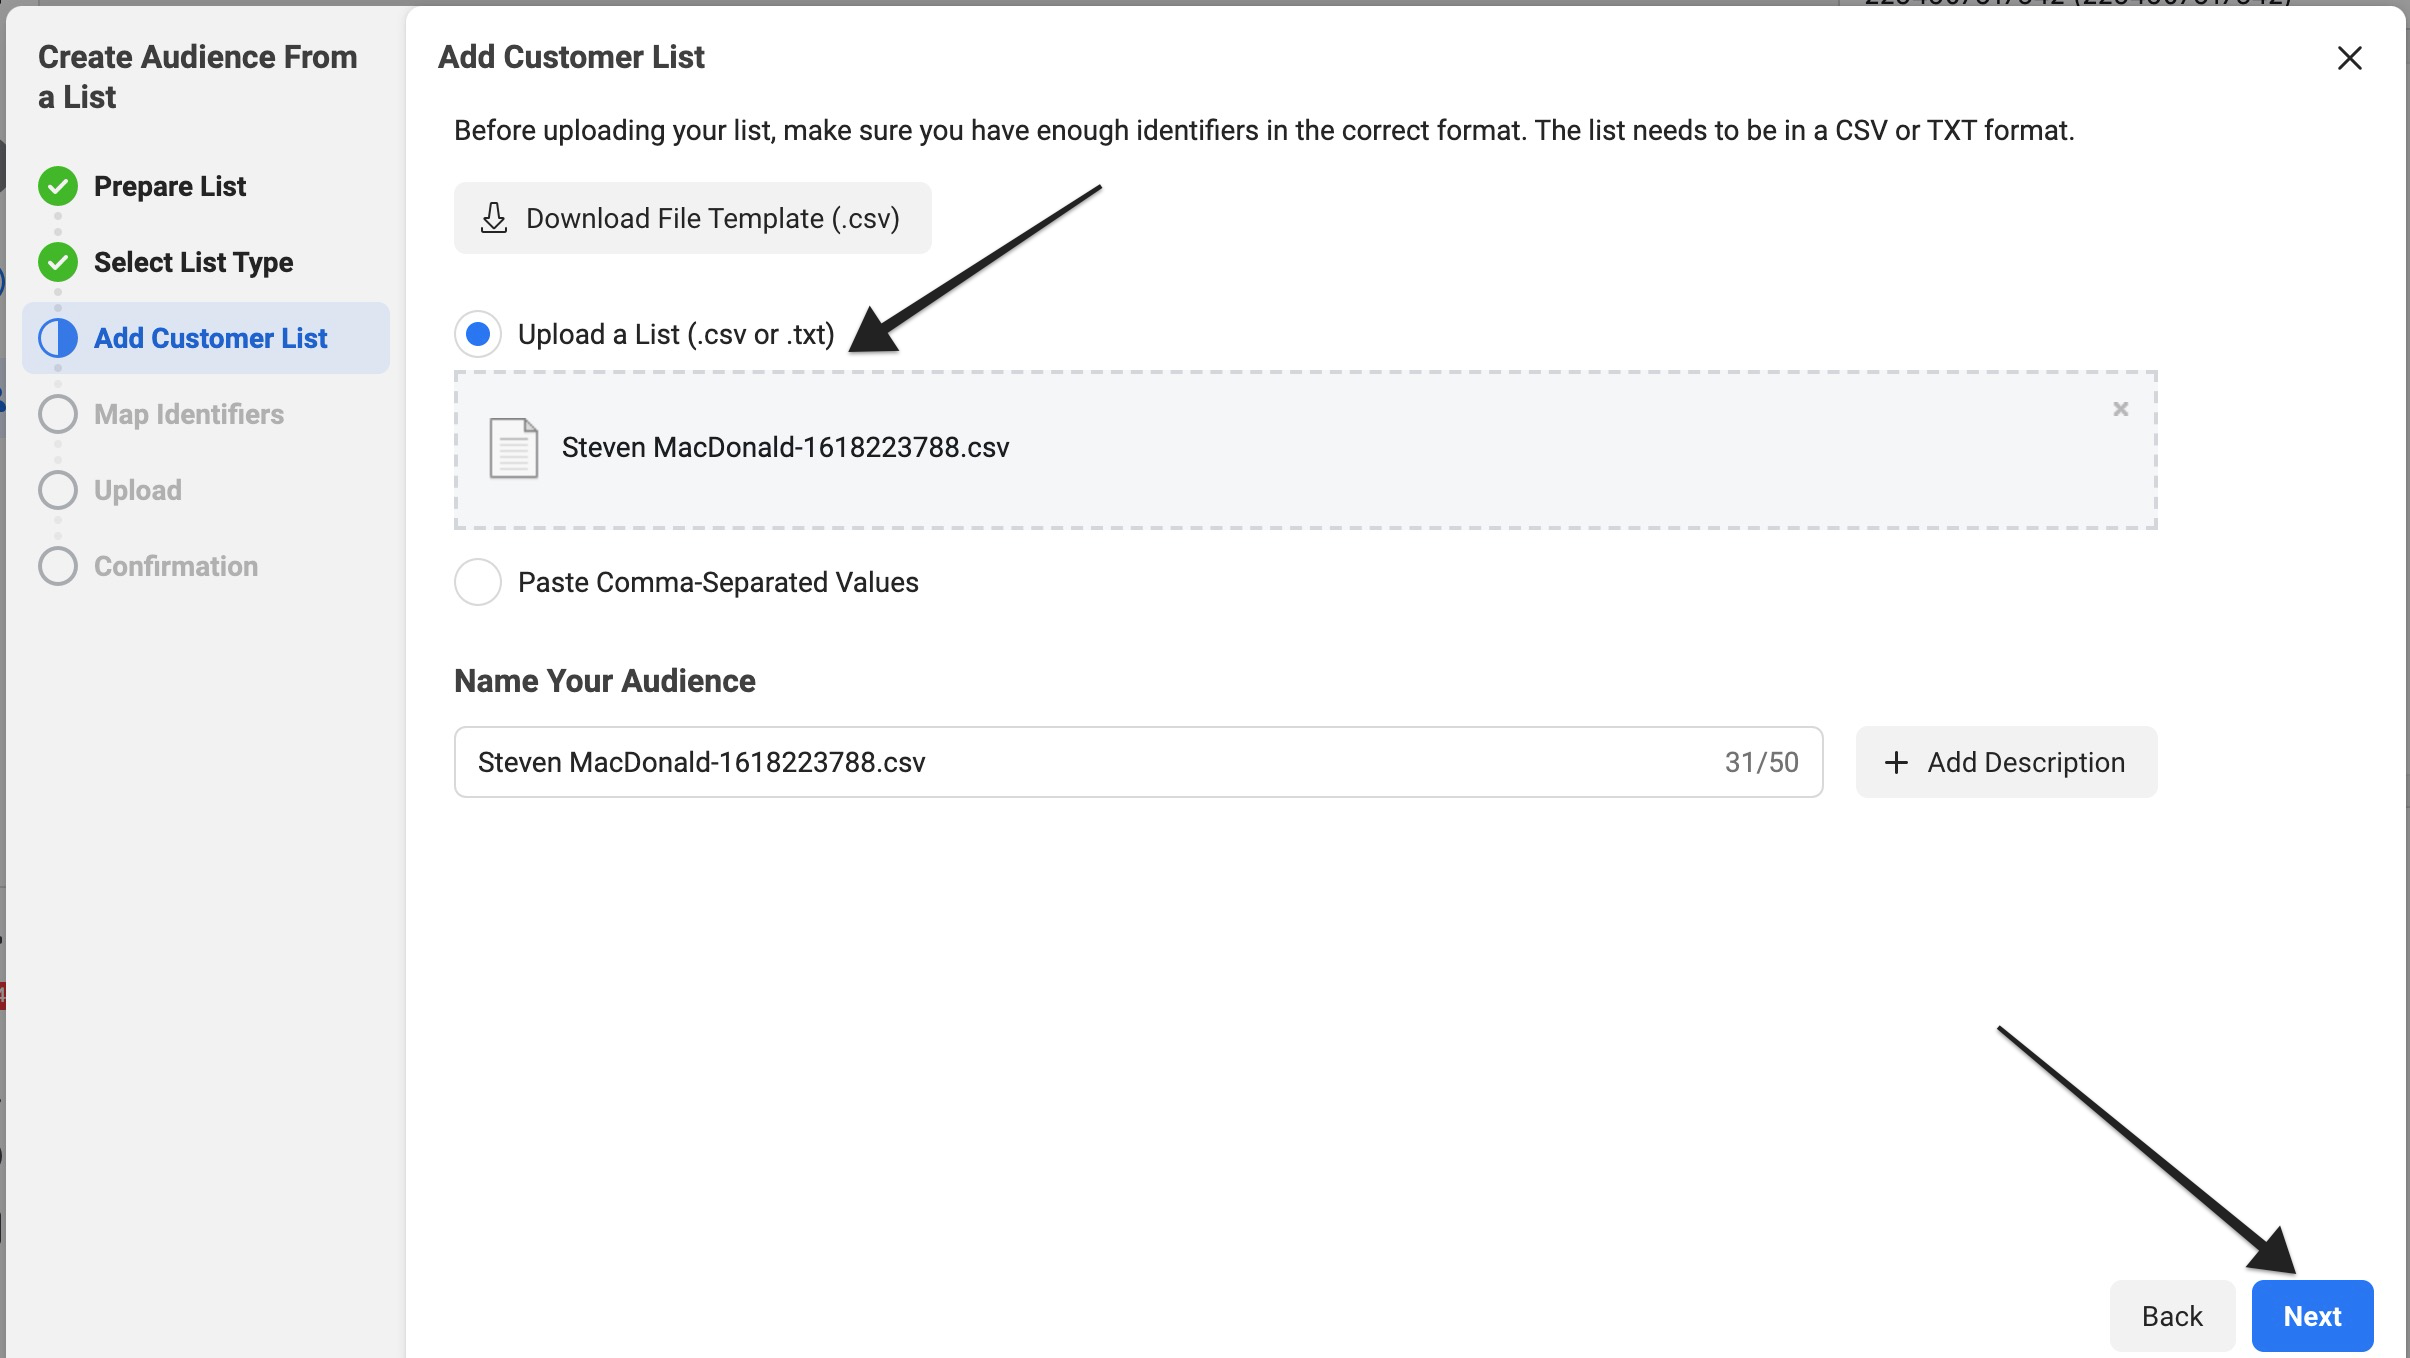
- STEP 6: Upload the .CSV file you downloaded from your account and click Next.
- STEP 7: Under the “Action needed” tab, click on “Enter Facebook page IDs,” and then copy and paste the page_id value from the .CSV file you downloaded into the pop-up that appears on Facebook. If you have multiple Facebook pages attached to your account, you can separate the different page IDs using commas.

- STEP 8: Click Import & Create in the bottom right corner. Give it a few minutes for Facebook to upload and populate your new audience and then when you return to your Ads Manager > Audiences, your new custom audience with a name ending in “.CSV” will be available for you to use with any new ads moving forward.

-
- NOTE: Your new Custom Audience might initially show up with an “error” message under Availability immediately after you create it. This is temporary and will usually resolve by itself after Facebook completes the process of populating your new audience. Just give it a little bit of time and refresh the page. This should resolve the issue and change the Availability status to Ready after a few minutes.